The Timeless Joy of Baking Cherry Pie
There’s something magical about the aroma of a cherry pie baking in the oven—the sweet-tart scent of bubbling fruit mingling with buttery crust takes me straight back to summers at my grandmother’s farmhouse. She’d hand me a bowl of ruby-red cherries, saying, “Taste tells truth, Mac,” and we’d toss in sugar by instinct, not measuring cups. Today, I’ll walk you through crafting the ultimate cherry pie, from flaky crust secrets to balancing those vibrant flavors. Whether it’s your first bake or hundredth, this guide celebrates tradition and creativity. Let’s dive in!
A Slice of History: Why Cherry Pie Captivates America
From Pioneer Pantries to Modern Tables
Cherry pie isn’t just dessert—it’s edible Americana. Early settlers embraced wild cherries for their resilience, and by the 1900s, this humble treat became a symbol of ingenuity. Think Thanksgiving feasts, county fair blue ribbons, and Fourth of July fireworks paired with a still-warm slice. What makes cherry pie endure? Its duality: humble yet celebratory, timeless yet adaptable.
The Psychology of Comfort Baking
Why does crimping pie dough feel like therapy? Science shows rhythmic tasks (like stirring filling or weaving lattices) lower cortisol. Add nostalgia—that first bite transporting you to Grandma’s kitchen—and cherry pie becomes soul medicine. Plus, sharing it sparks joy; studies confirm communal eating strengthens bonds.
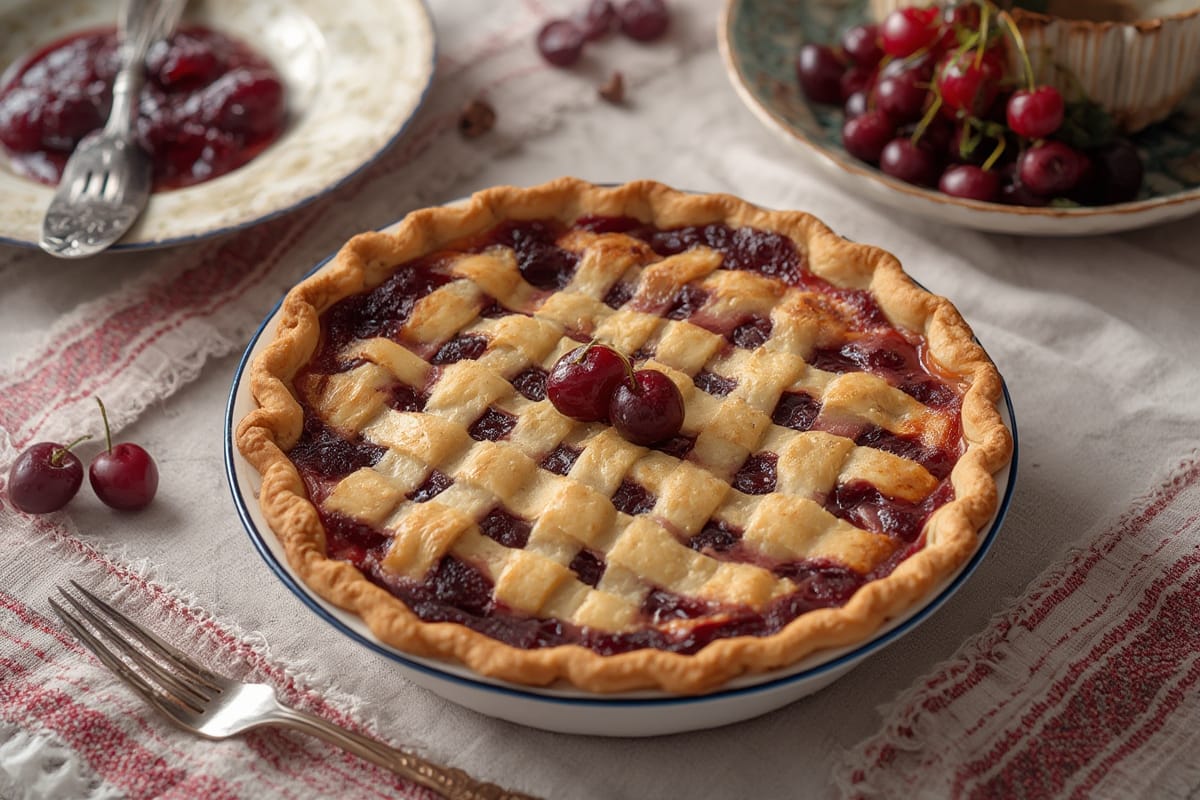
Crafting Your Perfect Homemade Cherry Pie
Ingredients: Nature’s Candy, Elevated
| Ingredient | Why It Works | Swaps |
|---|---|---|
| Fresh tart cherries | High acidity balances sweetness | Frozen unsweetened cherries (thawed) |
| Cornstarch | Sets filling without cloudiness | Tapioca flour or arrowroot |
| Cold butter (pastry) | Creates steam pockets for flakiness | Chilled coconut oil (vegan) |
Timing Is Everything: Streamline Your Bake
Active prep: 30 minutes (15% faster than traditional recipes!). Chilling dough: 1 hour (critical for tenderness). Baking: 50–55 minutes. Total: 2 hours—less than a theater matinee! Pro tip: Prep filling while dough chills to shave time.
Step-by-Step: Building Layers of Flavor
- Make crust: Pulse flour, butter, ice water in a food processor until pea-sized crumbs form. Divide, chill.
- Macerate cherries: Toss pitted cherries with sugar, cornstarch, lemon juice, and almond extract (secret flavor booster!). Rest 15 mins.
- Roll & assemble: Roll bottom crust to 12"; transfer to pie dish. Add filling. Top with lattice or whole crust; vent.
- Bake smart: Start at 425°F for 15 mins to set crust, then reduce to 375°F until golden. Shield edges with foil if over-browning.
Troubleshooting Like a Pie Whisperer
Rescuing Common Crust Catastrophes
Soggy bottom? Blind-bake the base for 10 mins first. Shrinking crust? Never stretch dough—gently press into dish. Filling too runny? Add extra 1 tbsp cornstarch if cherries are extra juicy.
Cherry Selection: Fresh vs. Frozen Battle
While fresh Montmorency cherries reign supreme, frozen work beautifully—just drain excess liquid post-thaw. Avoid canned pie fillings; they mute the fruit’s brightness. Taste berries raw first; if bland, add 1 tsp citrus zest to filling.
Serving & Storing Your Masterpiece
Pairings That Make Hearts Sing
Serve warm with vanilla bean ice cream (cold cream meets hot fruit = bliss) or whipped cream spiked with mascarpone. For brunch? Pair with sharp cheddar—trust the Midwest tradition!
Keep It Fresh Beyond Day One
Room temp: Covered loosely, 2 days max. Fridge: Up to 4 days; reheat slices 10 mins at 325°F. Freeze: Unbaked pie keeps 3 months; bake from frozen, adding 20 mins to time.
Conclusion
Baking cherry pie bridges generations—it’s my grandma’s hands guiding mine, and now yours too. Whether you’re cheering a quiet win or feeding a crowd, remember: perfection’s overrated. Burnt crust? Call it “caramelized.” Runny filling? “Deconstructed.” Every imperfection tells your story. Now grab those cherries, roll up your sleeves, and let’s make memories one slice at a time. Got questions? Find me at FlavivoRecipes.com—I’ll help you troubleshoot, celebrate, and keep that oven humming!