Looking for a dessert that’s rich in nostalgia yet effortless to make? This comforting and creamy Icebox Cake might just be your new favorite. In this article, we’ll explore the history behind this no-bake treat, provide a foolproof step-by-step recipe, answer your most pressing FAQs, and share flavor-enhancing tips from my own kitchen. Whether you’re a beginner or a seasoned home cook, you’ll learn how to make an icebox cake that’s both impressive and irresistibly delicious.
Let’s dive into the heart of summer sweetness—one chilled layer at a time.
Growing Up with Icebox Cake: A Chill Dessert with Warm Memories
Where My Love for Icebox Cake Began
I’m MacMar, born and raised in Charleston, where summer heat can flip your moods like flapjacks on the griddle. One of my earliest memories is standing on a wooden crate beside my grandmother while she layered chocolate wafers and whipped cream in her Pyrex dish. She didn’t follow a written recipe—just a sense of taste, texture, and a whole lot of love.
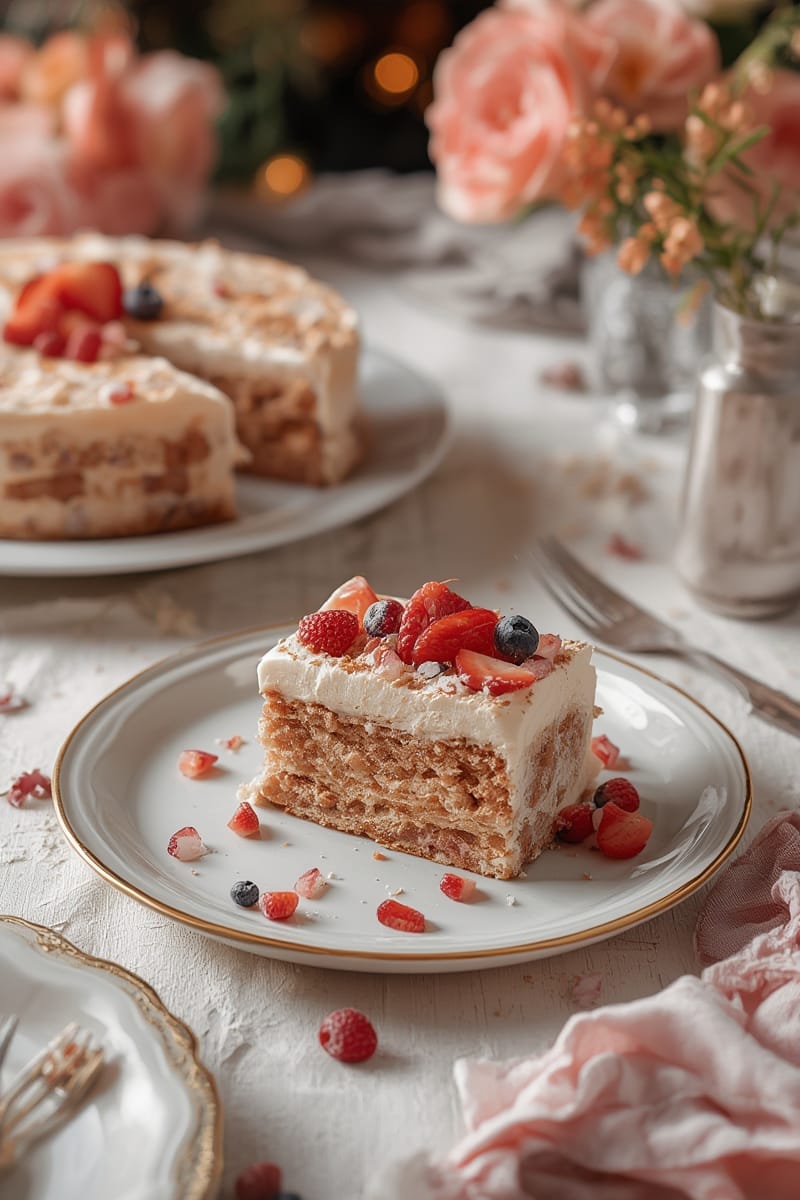
That Icebox Cake was always our bridge between blazing heat and cool, creamy satisfaction. We’d pop it into the “icebox” (yes, that’s what we still called the fridge), and by the time dinner plates were cleared, dessert would be ready. To this day, it’s still one of my favorite no-bake desserts to serve at backyard BBQs or share at the church potluck table.
I’ve kept the heart of Grandma’s icebox cake but put a little ‘MacMar’ twist on it to make the layers pop with updated flavor while preserving that retro charm. When I first shared my version on my post about dairy dessert swirls, the feedback was instant: people LOVE a recipe that feels familiar but fresh.
ICEBOX CAKE is more than a dessert—it’s a humble slice of food history wrapped in whipped cream and cookie crumbs.
Why Icebox Cakes Still Matter
So what makes an ICEBOX CAKE worth your time (and fridge space)? It’s foolproof. You don’t need a mixer, a stove, or even a measuring cup if you eyeball well. There’s no water bath drama or crust mishaps. Hallelujah!
The magic lies in science and nostalgia. As the layers of wafers or graham crackers sit in the fridge nestled gently under clouds of whipped topping or pudding, moisture softens the cookies into sponge-cake perfection. In less than a day, you’ve got a dessert that tastes like it took hours in the oven.
At FlavivoRecipes, I focus on accessible recipes for real people—and icebox cake delivers every time. It invites you to improvise: add peanut butter, fresh berries, homemade whipped cream, or even a dash of coffee liqueur. It’s not just a cold treat; it’s a blank canvas.
Though variations abound, the heart of this cake is always cooling, comforting joy.
From Pantry to Chill: Let’s Make Icebox Cake Deliciously Simple
Creamy, Crunchy, Cool: Ingredients That Make the Difference
Here’s what you’ll need to recreate this decadent yet easy ICEBOX CAKE in your own kitchen. This version builds flavors layer by layer and gives you plenty of room to make it your own.
| Ingredient | Notes & Substitutions |
|---|---|
| 2 cups heavy whipping cream | Or use coconut cream for a dairy-free version |
| 3 tablespoons powdered sugar | Can substitute honey or maple syrup |
| 1 teaspoon vanilla bean | Adds warmth and balance |
| 1 box (9 oz) chocolate wafer cookies | Alternatively: graham crackers, digestive biscuits |
Optional additions: sliced strawberries, mini chocolate chips, Nutella, espresso powder, or peanut butter swirls.
For a deeper dive on flavor layering, you might enjoy exploring this USDA resource on flavor compounds—it explains how simple ingredients create complex tastes.
Prep, Chill, Enjoy: Timing the Perfect Slice
Good things take time—and nothing proves that better than a great ICEBOX CAKE. Here’s an easy breakdown of the recipe timeline.
- Prep time: 20 minutes
- Chill time: Minimum 6 hours (overnight preferred)
- Total time: 6 hours 20 minutes
That’s about 20% less active prep than a traditional baked cake. Let the fridge do the heavy lifting while you relax.
How to Make Icebox Cake: Step by Step
This recipe is forgiving, flexible, and practically foolproof. Here’s exactly what to do:
- In a chilled mixing bowl, whip the cream, sugar, and vanilla until soft peaks form.
- Spread a light layer of whipped cream in the bottom of an 8″ x 8″ square dish.
- Add a single layer of cookies to cover the whipped cream completely.
- Spread another layer of cream over the cookies. Repeat until cookies and cream are used up.
- Finish with a thick top layer of cream and garnish with cookie crumbs or fresh berries.
- Cover and refrigerate at least 6 hours. For best results, chill overnight.
- Slice with a serrated knife for clean layers.
If you’re unsure about layering presentation, check out our prep tips from the layered berry chia cups guide. Many of the same principles apply here.
Upgrade Your Icebox Cake Game with Flavors & Flair
Flavor Variations You’ll Want to Try Next
Once you master the basic ICEBOX CAKE, the flavor versions are practically endless. Some beloved combos from our kitchen experiments:
- Strawberry Shortcake: Use graham crackers, vanilla whipped cream, and fresh strawberries.
- Mocha Crunch: Add espresso powder to your whipped cream for a mild coffee bite.
- Lemon-Blueberry Dream: Swap vanilla for lemon zest, layer with blueberry compote.
- Tropical Treat: Layer coconut cream, pineapple slices, and crispy shortbread.
Don’t be afraid to mix and match unleashing your curious palate. At one of our farmer’s market Saturday samplers, I even served a chile mango version that got rave reviews!
Tips for Getting the Perfect Texture
- Use freshly whipped cream if you can—it holds better than thawed whipped toppings.
- Avoid overly thick cookie layers; thin wafers soften better.
- Refrigerate long enough. Six hours is minimum, but 12–24 is the sweet spot.
- Slice with a serrated knife. Don’t press—let gravity do the slicing.
Remember to press each cookie layer down gently as you go to ensure compact, easy-to-slice layers.
Storing, Sharing, and Savouring: Keeping It Cool After the Chill
Keeping Leftovers Fresh
Once your cake is ready and cut, you’ll want to store it properly to preserve those distinct layers and velvety textures.
- Use an airtight container or wrap the dish tightly with plastic wrap.
- Store in the fridge up to 4 days.
- For longer storage, freeze individual slices. Thaw for 15–20 mins before eating.
Want to make your ICEBOX CAKE hold firm during a potluck? Place the dish in the freezer for 1 hour before transport—it firms it up without freezing solid.
When to Serve Icebox Cake
This isn’t just a summer dessert—it’s versatile enough for:
- Casual weeknights when the oven’s too much
- Kid parties (they can help stack the cookie layers!)
- Romantic date nights with a swirl of liqueur
- Sunday brunch sweets
It pairs wonderfully with a bold espresso or a tart citrus spritz—keeping the balance smooth and refreshing.
FAQ
What cookies work best for icebox cake?
Classic chocolate wafers are ideal for their thin profile and rich flavor. Alternatives like graham crackers, speculoos, or vanilla wafers work wonderfully, too.
How long should icebox cake chill?
A minimum of 6 hours gives the cookies time to soften, but overnight (12–24 hours) creates the best sliceable texture.
Can you make icebox cake without whipped topping?
Absolutely. Freshly whipped cream or stabilized coconut cream are terrific substitutes. For dairy-free options, use plant-based whip or cashew cream.
How long does it last in the fridge?
You can store icebox cake up to 4 days in the fridge. It’s best eaten within the first two days for optimal texture.
Conclusion
ICEBOX CAKE is more than just an easy, no-bake dessert—it’s a living piece of culinary comfort that adapts to your mood, ingredients, and memories. Whether you’re throwing together a dessert on a hot afternoon or planning something special for Sunday dinner, the icebox cake has a way of delighting folks of all ages with its creamy layers and cool bite.
As someone who learned this dish over summer afternoons filled with vanilla bean and laughter, I’m here to tell you: let this cake be your invitation back into the joy of simple pleasures. No oven, no stress, just layers of love and delicious results.
And next time you’re crafting a cozy menu, be sure to pair your dessert with some raspberry almond breakfast bars or cool off first with our dairy-free coconut cream popsicles. Here’s to easy treats and full hearts.