Looking for a dessert that’s simple, impressive, and brimming with warm, comforting fall flavor? This rustic PEAR GALETTE is your go-to. In this post, I’ll walk you through everything you need to know to master this crowd-pleasing treat. From the perfect flaky crust to choosing the juiciest pears, this guide is packed with tested tips. We’ll talk substitutions, clever tricks to avoid a soggy bottom, and even if you can freeze a galette for later joy. Plus, I’ll sprinkle in a little of my story as MacMar—Charleston-born, grandma-trained kitchen wanderer—along the way.
Memories and the Magic of the Perfect PEAR GALETTE
A Sweet Slice of My Childhood
When I smell roasting pears and cinnamon, my heart travels right back to my grandmother’s narrow kitchen in Charleston where I first learned the art of cooking with my senses. No measuring cups—just eyes, fingers, and a big wooden spoon. That’s also where I first tasted something like a PEAR GALETTE, though we didn’t call it that. It was more of a “lazy tart,” as Granny used to say, made with whatever fruit we had on the brink of over-ripeness.
Fast forward a few decades, and I’ve passed that same spirit onto my style of cooking. This PEAR GALETTE is every bit a nostalgic throwback while still grounded in the bold, creative flavors that define FlavivoRecipes.com. It feels fancy but isn’t fussy. It’s made with pantry staples, skips the gadgets, and doesn’t take itself too seriously. That’s comfort food with a twist—and that’s my kind of dessert.
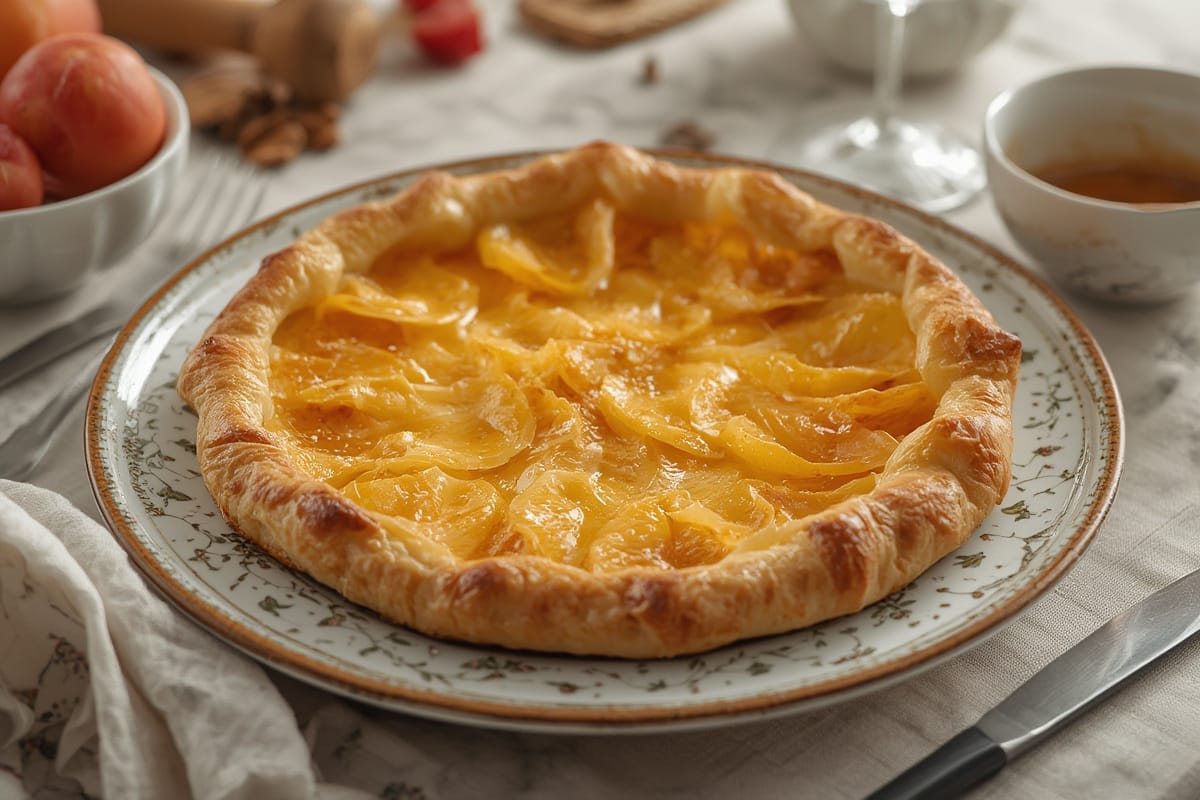
I whipped this up last fall for a dinner party in my backyard, surrounded by friends sampling dishes under string lights. The PEAR GALETTE stole the show. Its flaky crust and warm, spiced filling evoked smiles, laughs, and second helpings. That’s the magic of it—approachable, warm from the oven, and irresistibly golden.
And that’s what this blog is all about: food that feels like home while welcoming surprise guests to the table. So, let’s dive into this PEAR GALETTE. With the right tips—and I’ve got plenty, including how to avoid the dreaded soggy bottom—you’ll bake it like a pro.
Why a PEAR GALETTE Belongs in Your Repertoire
There’s plenty to love about galettes: no need for a pie pan, no intricate lattices, and no pressure for perfection. A PEAR GALETTE is the ultimate laid-back dessert with impressive results. Pears bake beautifully, holding their shape while inviting spice to shine through. Their gentle sweetness pairs well with everything from cardamom to vanilla and even a hint of black pepper.
Not to mention its adaptability. You can make it with store-bought crust on a busy weeknight or fully from scratch for a weekend project. And if you’re vibing with seasonal swaps? Apples, plums, or even figs will play right along. Just take care of that crust and balance your liquids, and you’re golden.
Craving more seasonal inspiration? The crust here is a cousin to what I use in my butternut-squash-pie-with-pecan-crumb, and the pear filling channels the cozy flavors I layer into spiced-oat-and-fruit-breakfast-bake. Comfort meets flair—my favorite kind of cooking.
How to Make the Best PEAR GALETTE at Home
The Ingredients You’ll Need (And Why They Matter)
To make this cozy PEAR GALETTE, go for ripe but firm Bartlett or Anjou pears. Overly ripe pears can leak too much juice and create sogginess. Keep skins on for added texture—or peel if you’re aiming for smooth elegance.
Here’s the full list:
- 1 ¼ cups all-purpose flour (plus extra for dusting)
- ½ tsp kosher salt
- 1 tbsp sugar (can sub brown sugar for depth)
- ½ cup (1 stick) cold unsalted butter, diced
- 3–4 tbsp ice water
- 3 ripe pears (Bartlett or Anjou), thinly sliced
- ¼ cup brown sugar
- 1 tbsp cornstarch
- 1 tsp cinnamon
- ½ tsp cardamom (optional but magical)
- 1 tsp lemon juice
- 1 egg (for egg wash)
- Turbinado sugar (for garnish)
Sub? Use coconut sugar instead of brown sugar for a deeper hit of caramel. Vegan butter works well in the crust, and you can skip the egg wash with a light oat milk brushing. Galettes aren’t rigid—they’re freeform in every sense.
If you’re after other warming spice-driven desserts, check out the base in my maple-acorn-squash-tart which uses similar crust ratios.
Timing Breakdown: From Counter to Table
Making a PEAR GALETTE isn’t time-intensive, but it’s wise to bake ahead so it sets properly.
| Step | Time |
|---|---|
| Prep ingredients & make crust | 20 minutes |
| Chill dough | 30 minutes |
| Assemble & bake | 45 minutes |
| Cool before serving | 20 minutes |
Total Time: ~1 hour and 55 minutes—20% less than many traditional pies.
Step-by-Step Instructions for Golden Results
In a bowl, combine flour, sugar, and salt. Add cold butter and pinch until crumbly. Add 1 tbsp water at a time just until dough comes together. Chill for 30 minutes.
Preheat oven to 400°F. Line a baking sheet with parchment.
On a floured surface, roll dough into a 12-inch circle. Set aside.
In another bowl, toss pear slices with lemon juice, brown sugar, cinnamon, cardamom, and cornstarch.
Spoon pears into the center of the dough, leaving 2 inches at the edge. Fold edges over, pleating as you go.
Brush crust with egg wash. Sprinkle turbinado sugar over crust and fruit.
Bake for about 40–45 minutes until crust is golden and filling bubbles.
Cool for 20 minutes before slicing for clean cuts and firm texture.
Want to know the secret to max flavor? Just like in my apple-walnut-crumble-loaf, let those spices bloom in the sugar-lemon mix before tossing them with the fruit—it amplifies their intensity.
And for those watching saturated fats or needing an alternative crust base, this USDA page offers helpful swaps for pie butter equivalents.
Mastering Pears and Crusts for the Flakiest Galette
Choosing the Right Pears & How to Prep
Not all pears bake equally. Aim for firm-ripe varieties like Bartlett, Anjou, or even Bosc. Soft, overripe pears create too much moisture and can overbake into mush. Quick trick? Press near the stem; slight give means they’re perfect.
Always core the pear using a melon baller or small spoon for clean centers. Don’t slice them too thin—⅛ to ¼-inch is ideal for even baking.
Want to level up flavor balance like I do in my roasted-sweet-potatoes-and-pears? A pinch of salt on the fruit filling transforms everything.
The Perfect Galette Crust Formula
No need to overcomplicate galette dough. It should be buttery, a little crumbly, and forgiving. Unlike pie crusts, galettes welcome imperfections. Patch tears easily by pressing dough back together.
Things that ensure flakiness:
- Keep butter cold.
- Avoid over-mixing.
- If dough feels sticky, chill again before working.
Add-ins like rosemary, black pepper, or orange zest offer depth without overshadowing the pear. That’s the jazz part of cooking I learned working out of my first food truck. Marrying layers of flavor keeps eaters curious.
Storage, Reheating & Creative Variations
How to Store, Freeze, and Reheat a PEAR GALETTE
Room temperature storage works fine for up to 2 days—but refrigerating extends life by another 2–3 days. Wrap loosely in foil. Reheat at 300°F for 10–12 minutes to bring back the crisp.
To freeze: Wrap the unbaked, assembled galette tightly in plastic and foil. Freeze up to one month. Bake straight from frozen, adding 10 extra minutes to cook time.
Seasonal Twists & Entertaining Tips
Winter-wise, toss pears with chopped crystallized ginger or ricotta dollops. Spring bounty? Rhubarb and pear. Hosting a brunch spread? Mini galettes made in ramekins give guests their own golden crust.
Serve with cinnamon whipped cream or vanilla ice cream for that final “wow.” Or go simple—black coffee and a warm slice. It’s that adaptable.
FAQ: PEAR GALETTE Troubleshooting and Tips
What pastry works best for galette?
All-butter shortcrust is classic, balancing crisp and tender textures. Avoid overly flaky puff pastry as it lacks stability.
Do you need to pre-cook pears?
No. Slicing ripe, firm pears allows them to bake perfectly without mushiness. Pre-cooking can lead to texture loss.
How do you prevent a soggy bottom?
Tossed cornstarch absorbs moisture, and baking on parchment promotes even heat. Cooling before slicing also helps set structure.
Can you freeze a galette?
Yes, both unbaked and baked galettes freeze well. If freezing unbaked, wrap tightly and bake from frozen with added time.
Conclusion: Bake Bold, But Keep It Simple
The PEAR GALETTE isn’t just dessert—it’s a story baked in layers. Whether you’re sharing it with loved ones by candlelight or sneaking a sliver for breakfast, it’s one of those dishes that speaks comfort with a twist. That’s what I try to serve up at FlavivoRecipes: familiar, but surprising. Approachable, yet inspired.
I hope this galette finds its way into your seasonal lineup. Tag me with your creations—and don’t forget, smoke alarms are just part of the fun sometimes.