If you’re craving something cozy, rustic, and downright delicious, this pear tart is the answer. Whether it’s your first tart or your fiftieth, this guide will walk you through everything step-by-step—from selecting the ripest pears to achieving a tender yet crisp crust. Whether served warm with ice cream or cool as an afternoon treat, a pear tart never fails to impress. In this post, we’ll explore the story behind this dessert, provide foolproof instructions, and answer your most common questions.
Rooted in Flavor: My Journey to Pear Tart Perfection
A Sweet Lesson in Southern Kitchens
As a kid growing up in Charleston, I learned early that comfort food could tell powerful stories. I still remember the autumn afternoon I made my first pear tart in my grandmother’s kitchen. We didn’t use timers or fancy gadgets—just ripe fruit, time-worn tools, and our noses to guide us. We’d slice the pears thin, fan them out just so, and watch the golden crust puff in a well-loved oven. The smell of cinnamon and caramelized sugar would drift into every room, letting you know it was ready. That moment—warm, gooey, and just slightly imperfect—sparked my lifelong obsession with folding classic flavors into feel-good dishes.
As I grew into my culinary voice—through food trucks, potlucks, and markets—I kept this pear tart close to heart. It’s been tweaked along the way, always with the goal of making it even more accessible and mouthwatering. On FlavivoRecipes.com, I believe recipes should invite you in, not intimidate. This one is no exception.
Throughout this post, you’ll find everything you need to create your own incredible PEAR TART, with room for cozy creativity or quick-and-easy brilliance depending on your pantry and plans.
What Makes This Pear Tart Recipe Special?
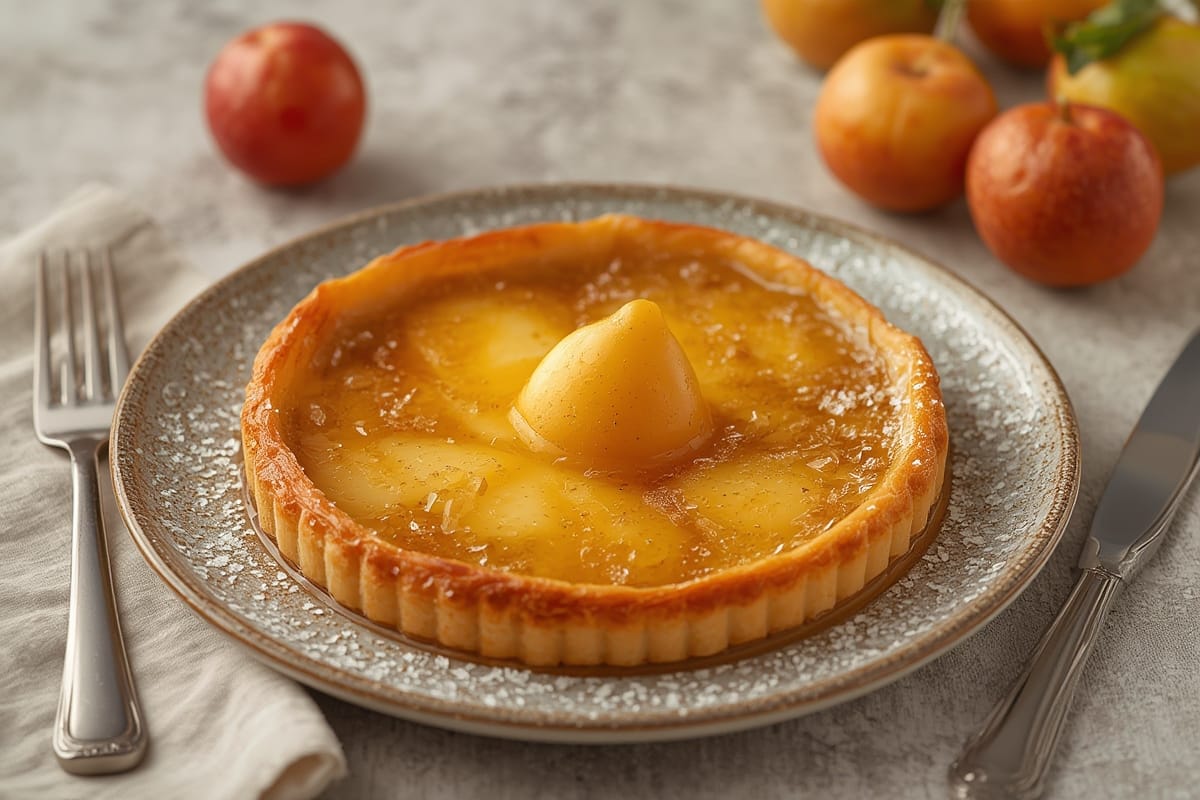
Unlike store-bought tarts that can taste sugary or one-note, this version balances the natural sweetness of pears with toasted almond and flaky, buttery pastry. A touch of cinnamon adds warmth, while lemon juice brightens every bite. The structure’s simple, yet impressive enough for any dinner party. Whether it graces your Thanksgiving table or becomes your summer potluck go-to, this PEAR TART is a heartwarming showstopper.
What I love most is how adaptable it is—swap crusts, flavor the filling differently, or even fold it into butter-laden rustic galettes depending on your mood or guests. It all comes down to texture and taste. And thanks to simple preparation and widely available ingredients, this dessert captures the spirit of Southern hospitality no matter where you call home.
If you’re new here, check out dessert classics like my vegan chocolate cream pie or cozy staples like plant-based banana bread. Just like this PEAR TART, they flow from the same philosophy—cooking from scratch doesn’t have to mean stress.
Crafting the Perfect Pear Tart: Ingredients and Timing Matter
Ingredients List: Flavorful Staples, No Fuss
To begin your pear tart journey, here’s the ingredient lineup you’ll need. Feel encouraged to make substitutions based on diet, flavor preferences, or what’s in your fridge.
| Main Ingredients | Substitutes & Tips |
|---|---|
| 3 ripe Bartlett or Bosc pears | Firmer pears may need longer bake; peel only if skin is tough |
| 1 sheet puff pastry or shortcrust (store-bought or homemade) | Use gluten-free crust or almond flour tart shell as needed |
| 2 tablespoons brown sugar | Maple syrup or coconut sugar works beautifully too |
| ½ teaspoon cinnamon + pinch of nutmeg | Cardamom or ginger adds nice complexity |
| Zest + juice of ½ lemon | Orange zest works if you want a floral note |
| 1 egg (for brushing) | Non-dairy milk with maple syrup creates a vegan glaze |
You can also spike your mix with a splash of vanilla or almond extract or, for an upscale twist, brush the pears with apricot preserves during the final minutes of baking.
Timing: Prep to Plate in About 1 Hour
Busy bakers rejoice—this tart doesn’t hog your whole day. Total time comes in around 60 minutes, which is 20% less than complex custard tarts and multilayer cakes.
- Prep time: 20 minutes
- Bake time: 35–40 minutes
- Cool time: 10 minutes
- Total: ~1 hour
This makes it great for a quick brunch dessert after your go-to plant-based frittata.
Step-by-Step Instructions: Intuitive Baking for All Levels
- Preheat oven to 375°F (190°C). Line a baking sheet with parchment.
- Roll out puff pastry or shortcrust into a 9-inch circle. Place it on the sheet.
- Core and slice pears into thin segments (about ¼-inch). Fan them out over pastry.
- Mix brown sugar, cinnamon, nutmeg, and zest. Sprinkle over pears.
- Drizzle everything with lemon juice.
- Fold crust edges inward (about 1 inch over fruit) for rustic appeal.
- Brush exposed crust with egg or glaze.
- Bake for 35–40 minutes until crust is golden and pears look glossy.
- Brush fruit with melted apricot preserves for optional shine.
- Cool and serve with a scoop of vanilla or dairy-free coconut ice cream.
Store leftovers in the fridge and reheat in a toaster oven for 10 minutes to restore crispness.
For nutritional context on pear health benefits, check out this FDA resource on fruit nutrition.
Elevating the Pear Tart with Tips and Flavor Variations
Smart Techniques for a Flawless Crust
Want a golden crust that doesn’t turn soggy under juicy pears? Here’s how:
- Blind-bake shortcrust at 375°F for 10 minutes with pie weights.
- Sprinkle crushed almonds or oats on the raw dough before adding pears.
- Bake tart in the lower third of the oven to promote crisp bottoms.
If puff pastry’s more your style, don’t overload the tart with fruit or syrup—light layering keeps it flakey. For more guidance, I’ve used the same approach with my homemade veggie pot hand pies, and it’s foolproof every time.
Swap & Spin: Creative Pear Tart Ideas
You can remix your PEAR TART to match seasons or moods. Some favorites:
- Summer: Add sliced strawberries or raspberries with the pears.
- Fall: Mix pears with diced apples and cloves.
- Holiday: Be bold—add sharp blue cheese crumbles and a honey drizzle.
- Vegan: Use coconut oil crust and agave in place of sugar and glaze.
Want to try a savory edge? Swap cinnamon for rosemary and add sautéed onions. It tastes like a French tarte fine and pairs with a green salad or a roasted veggie main beautifully.
Pear Tart Know-How: Storage, Serving & Troubleshooting
How Long Does Pear Tart Keep?
Your pear tart lasts 2 to 3 days refrigerated. Wrap loosely in foil or layer parchment between slices to avoid stickiness. Reheat at 325°F for 10 minutes for optimal texture.
Avoid microwaving if you’re craving that just-baked crisp. Bonus hack: Freeze the unbaked and assembled tart—just toss right in the oven at 375°F straight from frozen.
Serving Suggestions That Highlight Flavor
To keep pears as the star of the show, serve your tart simply. Fresh whipped cream or a dairy-free vanilla yogurt dollop works magic. Here are my favorite pairings:
- Dust with powdered sugar
- Top with crushed candied pecans
- Serve alongside a cinnamon chai latte
Or slice thin and add it to a brunch board right next to vegan scones and fresh berries.
FAQs
Do you blind-bake for pear tart?
Yes, especially when using shortcrust. Blind-baking ensures a crisp base and prevents sogginess from juicy pears.
How ripe should pears be for tart?
Choose pears that yield slightly to pressure—firm enough to slice cleanly but sweet to the nose. Avoid overripe ones that feel mushy or ooze juice.
How do you keep the crust crisp?
Blind-bake the crust, sprinkle a dry base layer (almonds, breadcrumbs), and avoid over-saturating the fruit. A hot oven and parchment also help vent moisture effectively.
How long does pear tart keep?
Properly stored in the fridge, it stays fresh around 3 days. Reheat in the oven to regain texture.
Conclusion: A Tart That Feels Like Home
No matter your skill level, this pear tart delivers in both flavor and feeling. It’s rustic without being rough, elegant without extra effort. Biting into that flaky, golden shell layered with sweet, spiced pear is like a warm hug from the past. And that’s the best kind of dessert—one that tells a story, shares itself easily, and welcomes everyone to the table.
Whether you’re revisiting a childhood favorite or discovering the magic of baking for the first time, this PEAR TART brings comfort, creativity, and crisp buttery joy straight to your kitchen. Bookmark this recipe and invite someone you love to join you in making it. From my kitchen to yours—happy baking.